Hall of the Twisted Warlord |
|
|---|---|
Dungeon |
|
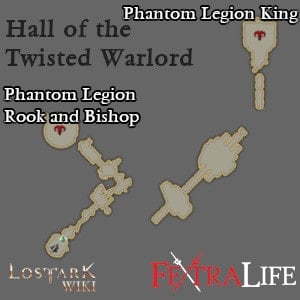
Abyss Dungeon Map
|
|
| Entry Requirement | Level 50 Item Level 460 |
| Tier | 1 |
| Players | 4 |
| Location | Phantom Palace |
Quests
|
|
Bosses
|
|
Hall of the Twisted Warlord is a Abyss Dungeon in Lost Ark. Hall of the Twisted Warlord Entry Requirements are Level 50 for your Character and Item Level 460. Abyss Dungeons are unlocked after completing the Waiting and Leaving Quest in the Northern Vern area from the Blue World Quest line. They can be accessed through the group finder or by visiting the shrine in main cities. Hall of the Twisted Warlord must be played with a party of 4 players. A character can only run each Abyss Dungeon 3 times a week.
In a world of illusion, danger is real
Don't let glamor catch you off guard
Lost Ark: Hall of the Twisted Warlord Guide
This dungeon is a linear path, all enemies must be cleared to advance into the boss areas. In this Abyss Dungeon both bosses have party wipe mechanics that require players to coordinate and position themselves well to pass. It is recommended that players have an understanding of what they have to do when they occur. The first boss fight against the Bishop and the Rook have attacks that are relatively slow moving, keep an eye on both bosses to watch out for attacks headed your way. The Phantom Legion King in the second fight is much more mobile and quicker to attack, be aware of their bigger damage abilities to avoid taking too much damage. Learn your roles and the mechanic for each boss fight to avoid party wipes and make sure to bring and ready stagger your stagger attacks for the second boss when they trigger their mechanic.

Boss Key Mechanics:
The first boss comes as a pair of bosses, killing one of them will enrage the other. Kill both bosses within a short period of each other to reduce the time having to fight the enraged other boss.
This fight comes with a party wipe mechanic that will be used twice. All players will get a target icon on their head with 3 players getting blue auras around them. The player without the aura is the targeted player, the Rook will charge up a party wiping projectile and fire it towards this player. The blue auras will push the targeted player around during this time. The targeted player has to move to position themselves so that the projectile hits the bishop. The second time the mechanic is activated the Rook will summon towers surrounding the bishop that players can destroy. The party will wipe if the projectile hits anyone or anything else other than the bishop.
The second boss has a party wipe mechanic that can wipe the party in 2 ways. When at 15 health bars and 5 health bars the boss will teleport to the middle and summon 4 phantom swords, each player will be chased by 1 sword. Touching the sword will give the entire team a stacking status effect that goes away after about 2 seconds. If the effect stacks to 2 stacks the party will wipe. During this time the boss will present a stagger check while charging up a big attack, failing to clear the stagger check will also cause a party wipe.
Lost Ark: Hall of the Twisted Warlord Rewards
On completing the Abyss Dungeon Hall of the Twisted Warlord players can be rewarded items from the list as follows:
- Mystarium Necklace of Great Rage
- Mystarium Earrings of Great Fury
- Mystarium Ring of Great Fury
- Mystarium Earrings of Great Wrath
- Mystarium Ring of Great Wrath
- Shard of dreams
- Legendary Fetranites
- Album with a legendary card
- Combat Engraving Sketch 1
- Combat Seal Book 2
- Class Seal book 1
- Class seal book 2
Lost Ark Abyss Dungeons Hall of the Twisted Warlord Guide
Summary of Recommendations and Tips for the Boss fights
Kill both bosses in the first boss fight within a short time of each other to avoid or reduce the amount of time you have to fight the enraged version of the remaining boss. Understand your roles when the party wipe mechanic begins, blue aura players should walk away to the edges to give the targeted player room to move. Pets can also get hit by the projectile and wipe the party so be careful with pet builds for this boss. Bring stagger effects or have some members with strong stagger effects to work on the stagger check, make sure the members with good stagger checks pick up the swords first to begin working on the checks faster. Whirlwind grenades can be helpful for the stagger check. Remember to watch for the status effect going away before picking up the swords in the agreed order to avoid a wipe as well.
Phantom Legion Rook and Bishop boss fight walkthrough
Boss Mechanics:
- Rook cross attack: The Rook slams into the ground and creates thick shockwaves in a cross pattern
- Rook punch + backhand: The Rook will do a punch followed by a backhanding attack, the second attack will knock players back when it hits
- Rook charge attack: The Rook will charge forwards damaging and knocking up any player in the way
- Bishop cross attack: The bishop fires a cross shape that is thin with a long range, then fires a second one 45 degrees rotated
- Bishop random orbs: Bishop will spawn small orbs in random places across the map that will cause the player to be knocked up when hit
- Bishop diamond shape orb attack: The bishop fires 4 orbs in a diamond pattern, will life the player up when hit
- Bishop casts a line spell that becomes a persisting ground effect, pulsing repeatedly dealing damage to players who walk over it
- Bishop fires 8 lasers in a pattern in order: North, South, West, East, Southwest, Northeast, Northwest, Southwest
Key Mechanic:
Killing one boss will cause the other one to enrage for the remainder of the fight. During the fight the boss will initiate a party wipe mechanic twice. All players will get a target icon on their head with 3 players getting blue auras around them. The player without the aura is the targeted player, the Rook will charge up a party wiping projectile and fire it towards this player. The blue auras will push the targeted player around during this time making it hard for them to move. The second time the mechanic is activated the Rook will summon towers surrounding the bishop, if the projectile hits the tower the party will wipe.
Strategy:
Kill both bosses without too much time delay between to reduce the amount of time you have to fight against the enraged version of the boss. The Rook boss primarily uses melee attacks so ranged attackers can safely stay at a distance and deal damage to them, while the Bishop boss is stationary in the middle of the map for the entire fight being an easy target for all. Players who get the blue aura should walk away to the edges of the map to not block the movement of the targeted player. The targeted player can walk close to the bishop during this phase to more easily position themselves for the projectile. Pets can be hit by the party wiping projectile and should be used with caution.
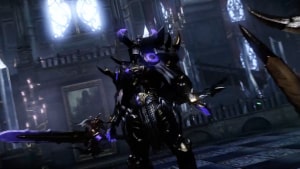
Phantom Legion King Boss fight walkthrough
Boss Mechanics:
- Charging attack: The boss will lunge forward dealing damage to players in the way
- Cone attack: The boss will charge up and launch a cone attack in one direction, often used after a movement attack
- Jump Attack: The boss jumps up then slams down with a small AOE, sometimes will do 3 jump attacks in a row
- Beam Attack: The boss will raise their sword overhead then swing in a direction, firing off a beam that knocks players back when hit.
- Spinning Swords: The boss spawns spinning swords in a large ring around them that start moving in towards them. There is a gap in the ring for players to run out from.
- Pizza Attack: The boss will stop moving and mark large sweeping slices of the map that then become areas that deal damage for a duration. As the duration ends the boss will mark new slices of the map and repeat. The stagger bar appears for this attack and players have to stagger the boss to end the attack.
- Triple Beam Attack: When the boss is low on health it may use this attack to fire the Beam attack in 3 directions at once.
Key Mechanic:
The boss will start its party wipe mechanics at 15 health bars and at 5 health bars. The boss will teleport to the middle of the map and summon 4 phantom swords, each player will be chased by 1 sword. When a player touches the sword, the entire team gains 1 stack of the status effect that goes away after about 2 seconds. If the effect stacks to 2 the team will wipe. During this time the boss will present a stagger check while charging up a big attack, failing to clear the stagger check will also cause a party wipe.
Strategy:
Bring attacks with stagger effects and watch for their cooldowns to make sure to have enough stagger for the party wipe mechanic. Organize before the fight the order in which players pick up the sword, the player with the highest or best stagger attacks should pick up the sword first every time so that they can begin working on the stagger check earliest. Make sure to wait out the duration of the effect before picking up the sword to avoid the party wipe. Players can spread out to the edges of the map when the boss is close the 15 or 5 HP bars in preparation and then all move and rotate around the map in one direction to be organized about the swords.
Hall of the Twisted Warlord Notes & Tips
- Notes & Tips go here..

