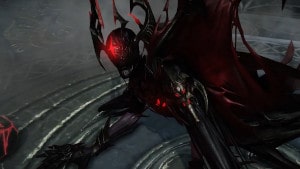
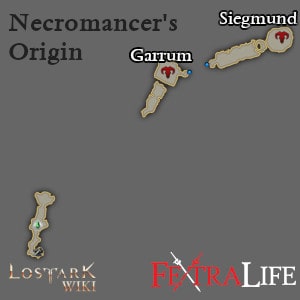
Necromancer's Origin |
|
|---|---|
Dungeon |
|
Abyss Dungeon Map
|
|
| Entry Requirement | Level 50 Item Level340 |
| Tier | 1 |
| Players | 4 |
| Location | Ancient Elveria |
Quests
|
|
Bosses
|
|
Necromancer's Origin is a Abyss Dungeon in Lost Ark. Necromancer's Origin Entry Requirements are Level 50 for your Character and Item Level 340. Abyss Dungeons are unlocked after completing the Waiting and Leaving Quest in the Northern Vern area from the Blue World Quest line. They can be accessed through the group finder or by visiting the shrine in main cities. Necromancer's Origin must be played with a party of 4 players. A character can only run each Abyss Dungeon 3 times a week.
Darkness and filth enveloped the once sacred city
This is due to the enchantment of the powerful necromancer Morgred
Lost Ark: Necromancer's Origin Information
This dungeon is a linear path, all enemies must be cleared to advance into the boss areas. This dungeon introduces a party wipe mechanic into the fight as well as a boss revival mechanic that can prolong the fight if done incorrectly. Players will have to coordinate with each other to make sure not to fail the mechanics.
The first boss does not move a great deal but the second boss has large map teleports with large AOE attacks. Keep track of the boss position using the minimap if you have to.

Boss Key Mechanics:
The party wipe mechanic is introduced by the first boss, the boss will roar and apply a stacking debuff to all players. The number of debuff stacks increasing during the fight and when the debuff reaches 5 stacks on any player the party will wipe and the run will end. Golden Orbs will spawn around the map that will clear and reset the counter on the debuff for the player using it. Take turns picking up the orbs so that the debuff does not make it to 5, using call outs in chat or agreeing on an order beforehand can help with this.
The second boss introduces a revival mechanic that triggers when it is low on health, this will happen more than once before the run ends. The boss will become invincible and fire off a white or red pulse that also leaves a floor effect of the color. Pairs of red and white orbs will spawn in each of the cardinal directions during this time. After a period of time the boss will stop being invincible and regain some health, if the players pick up the wrong orbs or too many matching colored orbs remain at the end of this duration, the boss can regain large amounts of health. To clear this correctly players have to select only the colored orbs that matches the color of the wave. It is best to coordinate beforehand which cardinal direction each player will take during this phase to quickly pick up all the orbs.
Lost Ark: Necromancer's Origin Rewards
On completing the Abyss Dungeon Necromancer's Origin players can be rewarded items from the list as follows:
- Necklace of Rage
- Earrings of Fury
- Ring of Fury
- Earrings of Wrath
- Ring of Wrath
- Oath of Elberian Knight
- Epic Fetranites
- Album with a legendary card
- Combat Engraving Sketch 1
- Combat Seal Book 2
- Class Seal book 1
- Class seal book 2
- Casting of metals. Beginner's Guide
- An armored case. Typical sketches
- Elberian Knight Equipment
Lost Ark Abyss Dungeons Necromancer's Origin Guide
Summary of Recommendations and Tips for the Boss fights
For the first boss keep to its sides to easily dodge many of its attacks while dealing damage. Make sure that players understand the party wipe mechanic and take their turns picking up the golden orbs otherwise the party could wipe here. Understanding the second boss mechanic is less crucial for the run as it does not lead to a direct party wipe, however failing it can lead to the fight extending by a large amount. Assign each player a direction to head towards when the boss starts its mechanic to more quickly activate all the orbs. Make sure players know to only select the correct one and not select both, calling out the correct color may also help with this phase. Keep track of the second boss as it is quite mobile and may use large AOE attacks from far away.
Garrum boss fight walkthrough
Boss Mechanics:
- 2 sided cone AOE attack: The boss will charge up 2 cone AOE attacks on opposite sides. The boss will try to use this attack 3 times, the directions of the attacks can change between casts.
- Tail swipe + Cone AOE: The boss will attack behind themselves with a tail swipe attack followed by a large Cone AOE also towards their back.
- 3 slow swipes: The boss will do 3 swiping attacks ahead of themselves, will move forward slightly during the swiping.
- 2 fast swipes then a slam + Large AOE: The boss will quickly swipe forward then do a small AOE slam at its feet. This is followed up by a large AOE around it self with a safe zone at its feet.
- Charge and swipe: The boss will charge forwards towards a player then perform a swipe attack.
Key Mechanic:
The boss will perform a roar that applies a debuff on to all players. This debuff will stack and if any player reaches 5 stacks all players will die and the run will end. The boss will roar multiple times throughout the fight, each roar the boss will also spawn a golden orb for players to pick up, the golden orb is visible on the minimap. When a player activates the golden orb they clear the debuff for themselves.
Strategy:
Stay on the sides of the boss closer to the tail to easily avoid the swipe attacks and move to safe zones quickly. Coordinate with the other players and take turns picking up the golden orbs so that no one gets to 5 debuffs stacks. Each player is assigned a number by their HP bars, these numbers can be used to set the order to pick up the orbs in an easy to understand and organized manner.
Siegmund Boss fight walkthrough
Boss Mechanics:
- Full Map AOE attack: The boss charges up a full map AOE attack that does a lot of damage, capable of a party wipe. During the charge up, the yellow stagger bar appears at their feet, players have to use attacks with stagger effects to
- Targeted AOE attack: The boss will target a player and launch an explosion AOE attack centered around their position. This will leave a region of persisting damage for players who walk over it.
- Large slow AOE cone attack: The boss will slowly charge up a wide cone shaped AOE in one direction.
- Large donut shaped AOE attack: The boss will use this attack together with movement abilities. The boss will charge up a large AOE attack around themselves but with a safe zone under their feet.
- Charge attack: The boss will charge forward dealing damage to players in the way
- Melee range slam attack: The boss will spin their red sphere over their head then slam it down near their feet.
- Spin attack: The boss will do a spin attack where they stand, sometimes used after a teleport.
- Meteor attack: The boss will do a slam in front of them, 4 meteors will fall from the sky with very small AOE, one of the meteors will launch 8 orbs in all directions
- 2 Part orb Attack: The boss will grab their orb overhead and slam it down on the ground launching 4 orbs in a plus shape, this is followed up by a second orb attack this time in an x shape, 45 degrees rotated from the first attack.
- Red Rain attack: The boss will shoot some streaks of red into the air, these will come down after a delay and create AOE regions that last for awhile, these will damage players who walk over them.
- Persistent AOE attack: The boss will stand still and spawn 3 small AOE areas that will create regions that last for awhile, these will damage players who walk over them.
Key Mechanic:
When the boss is low the boss will become invisible and fire off a white or red pulse that also leaves a floor effect of the color. Pairs of red and white orbs will spawn in each of the cardinal directions during this time. After a period of time the boss will stop being invincible and regain health, some of attacks from the boss are now empowered and more powerful.
Strategy:
The boss moves long distances during the fight, players can use the red attack indicators or the minimap to locate them. Remember what attacks you have that apply stagger effects for the stagger check, bringing and using whirlwind grenades to apply additional stagger can be useful. For the invincibility mechanic, coordinate with the team before the fight to assign each player a direction to take. Check the color of the floor effect if you miss the color of the initial pulse and grab the orb in your assigned direction to quickly collect all the orbs.
Necromancer's Origin Notes & Tips
- Notes & Tips go here..

